


Did you know that Windows 10 features a program called the Xbox Game Bar that can record your screen? If you want to film games or make a tutorial for someone who utilizes Microsoft Office, you may use it to record a video of your actions in almost any Windows app on your laptop. We’ve given a few straightforward steps to follow for how to record your screen in Windows 10 to make the process simpler for you.
The screen recorder is a component of the Xbox software, which is preinstalled in Windows 10. You can now capture screenshots and even create memes with Xbox Game Bar thanks to some significant upgrades that make it more practical. Do you want to know how to record your Windows 11 screen?
We have your back. Also, you may learn how to speed up Windows 10 boot time, what the finest Windows 10 keyboard keys are, and how to mirror your screen to a TV or monitor. How to screen record on a laptop is described in this post.
How to Record Your Screen With The Xbox Game Bar
The Xbox Game Bar is a feature of both Windows 11 and 10 that allows you to record your display while using programs. The Game Bar is the quickest method to screen capture on Windows because it comes preloaded on your computer:
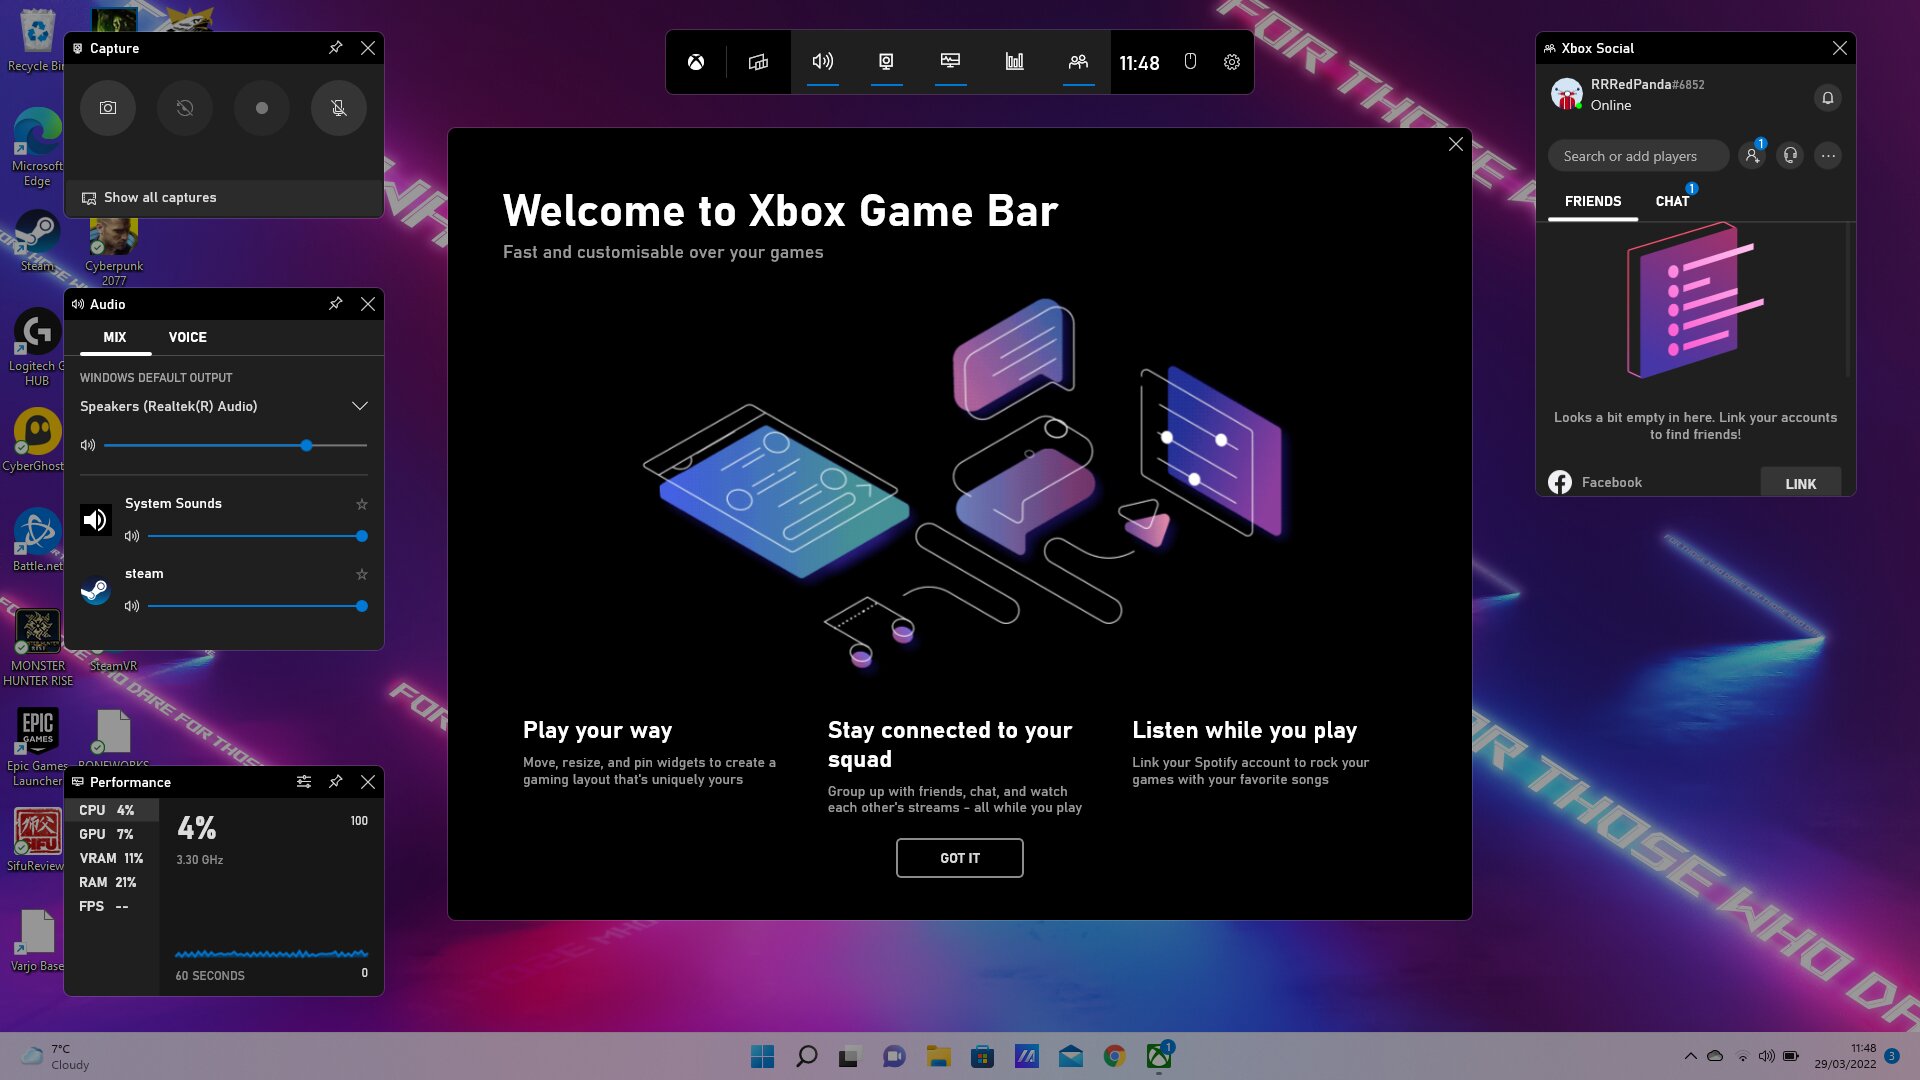
- To launch the program, hit the Windows key + g on your keyboard or conduct a search for Xbox Game Bar.
- The Capture window can be located in the upper-left corner. Choose the Capture icon (the video camera) in the top toolbar if you can’t see it.
- Capturing will be available on the left side of the pop-up window after selecting the Settings gear in the toolbar.
- If all you want to record is audio from the app and your microphone, select All, None, or Game under Audio to Record. When finished, close the Settings window.
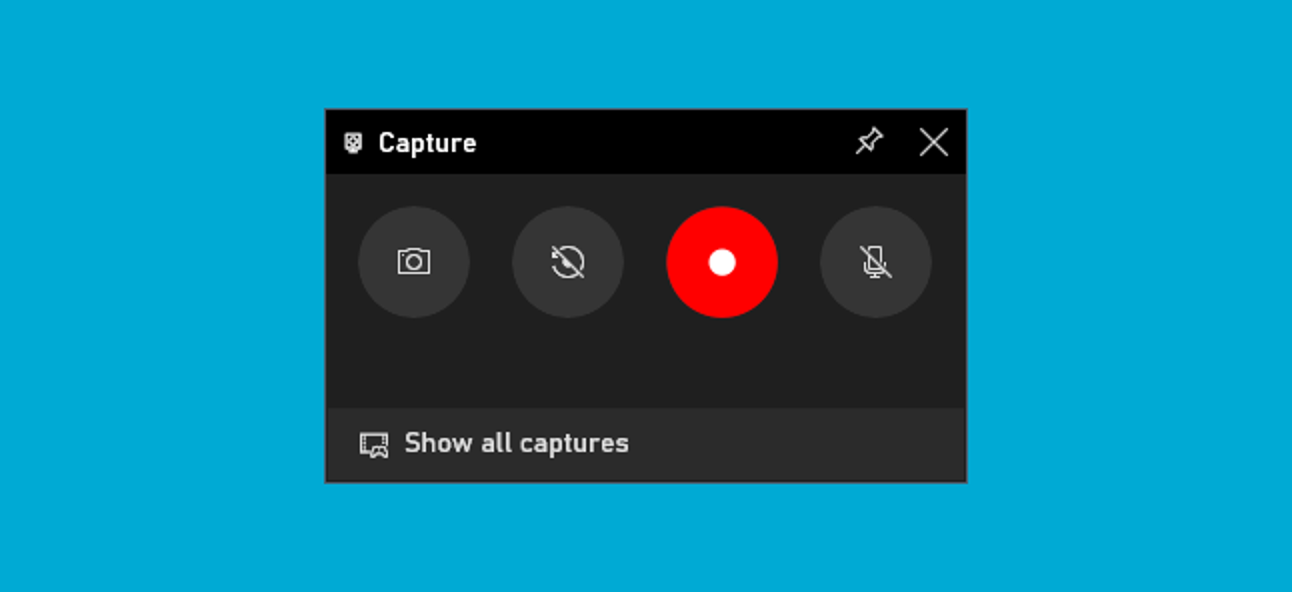
- The app or game you wish to record should be opened. Choose the Record icon in the Capture window by opening the Xbox Game Bar.
- Your screen’s upper-right corner will display a window with a timer to let you know it’s being recorded. Choose the Stop symbol once you’re done recording.
- To see your recording, either open the Xbox Game Bar or choose the Game clip recorded pop-up notification.
- A preview of your recording will appear when you launch the Xbox Game Bar Gallery. Choose the Gallery icon if it does not appear automatically (the game controller and film). To see the video in File Explorer, choose the Open file location.
Related: Two Ways to Make a ‘USB Drive’ that Can Boot Windows 11
How to Screen Record with A Third-Party App
You’ll need to utilize a third-party tool in order to record your Windows desktop and File Explorer or if your computer is running an older version of Windows.
Several of these programs have functionality not seen in the Xbox Game Bar, such as built-in editing tools. Screenpresso, for instance, may convert written letters and words into editable text, albeit such features are typically more expensive.
How to Record Your Screen With ShareX
Using the free ShareX screen capture program, follow these steps to record your screen:
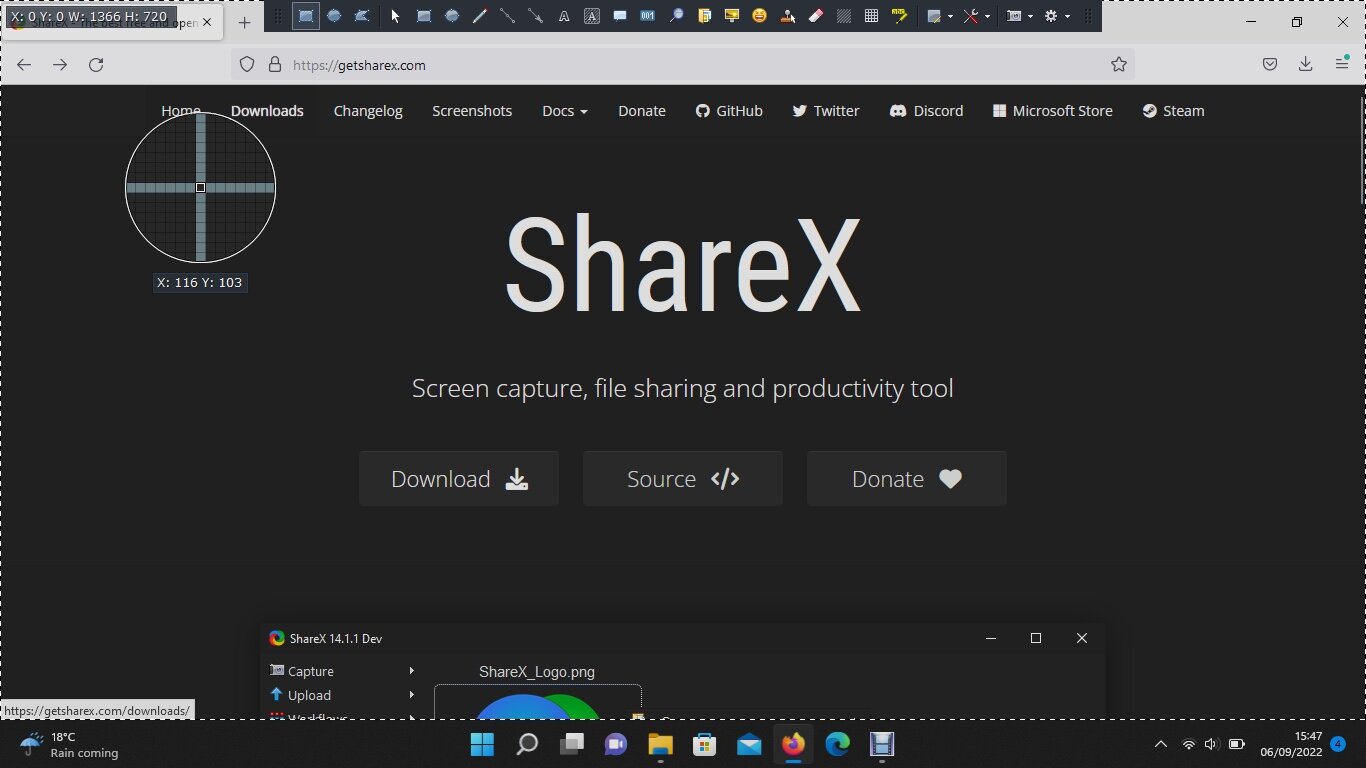
- To install ShareX on your computer, download it and run the installation file.
- To record an MP4 video, choose Screen recording or Capture > Screen recording in ShareX.
- Choose a window or drag the mouse to highlight a recording area. Choose your desktop if you want to record the entire screen. The moment you make a choice, the recording will begin.
- The Windows taskbar will display a red dot indicating that the screen is being recorded. Click the red dot in the upper right corner and choose to Stop to end recording.
- To see your recording, choose it in ShareX, or click the file and choose Open > Folder from the context menu to view it in Windows File Explorer.